Small Problems
The weather was mostly cloudy and rainy for three weeks after my first series of imaging sessions with the Dwarf 3. However, I did manage to get in a short session imaging part of the Leo I Cluster in late April. I’ve shot part of this cluster before, so I had an image to compare the Dwarf 3’s results against. The processed image was somewhat puzzling:

This was the result of a little over two hours of integration–or so I thought. It may appear normal at first glance, but it was far noisier and less detailed than I was expecting.
Each subframe was a 60-second exposure at a gain of 60. The DWARFLAB software on my phone will show the number of shots taken and the number of shots that were included in the live stack. I assumed that the live stacked images were of acceptable quality and that most, if not all, would be stacked by Siril. However, upon closer inspection I realized that only a small fraction of the 120+ images was being used. Siril had rejected the majority of images due to tracking errors.
A subsequent review of the 60-second exposures that I took for some of the objects in my previous post revealed the same pattern.
What was the cause? As of this posting, I am not certain. But I think it may be one or more of the following factors:
- It was windy during the imaging sessions. Maybe I had the telescoping tripod legs extended too far, thus compromising the stability of the rig.
- I had set the tripod on the concrete driveway where vibrations from the road and people walking on the sidewalk might have been transmitted to the scope.
- I was being too optimistic about the scope’s tracking abilities. The 15-second subframes looked good, but maybe 60 seconds is simply too much to expect.
Furthermore, the alignment was never perfect on my previous attempts, but within acceptable tolerance according to the prompts in the app. Setting the scope to the proper angle (latitude) is a tedious process with my tripod. I had been using a bubble level app on my phone to set the angle, but the phone is too big to sit level against the scope. I was never certain if I was anywhere near the correct angle, but I assume that the DWARFLAB app will compensate for small deviations in the alignment.
There are too many variables to account for in the limited time that I have for imaging, so rather than troubleshoot for each suspected problem, I chose to address them all.
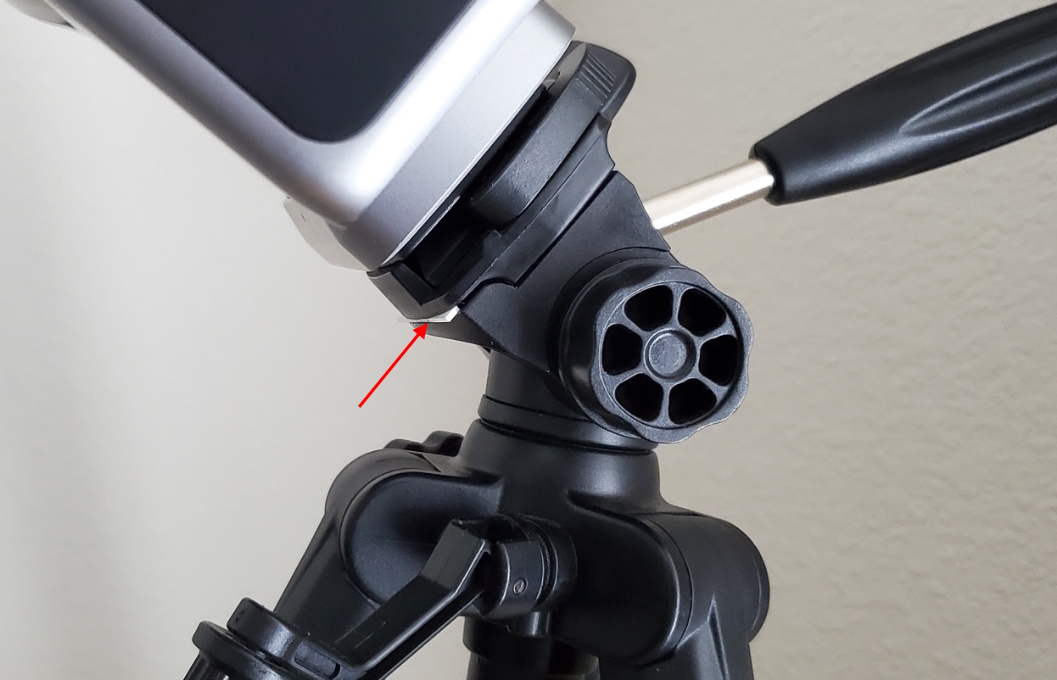
My solution to the scope angle was to buy an inexpensive angle finder from Harbor Freight. The magnetic base sits on a steel screw on the tripod mounting plate. I was able to set the angle before an imaging session by leveling the tripod on the floor and then adjusting the plate angle using the finder.

The weight of the scope was causing flexure in the mounting plate. A little shim of styrene that I had on hand fixed that problem.
The next clear night was May 3rd. With shortened tripod legs, I set the rig in the grass next to the driveway. The deviation from polar alignment came out to 0 degrees on the first attempt! So, I started taking shots of M81/M82. The image below is the result of 723 15-second exposures at a gain of 60, totaling a little over 3 hours of integration. The sky wasn’t perfectly clear that night due to smoke coming up from Mexico. Clouds came in around 1:00 AM. Still, I think it turned out much better than my previous attempt:

Messier 81 has a beautiful spiral structure. I think the central region is mostly composed of older stars, but the outer parts of the spiral arms have a lot of newer, bluish stars. Messier 82 is undergoing a burst of star formation.
The next night I targeted M51. Alignment went well, again, with 0 degree deviation on the second attempt. This image is from 906 15-second exposures at a gain of 60, totaling a little over 3 hours and 45 minutes of integration time.
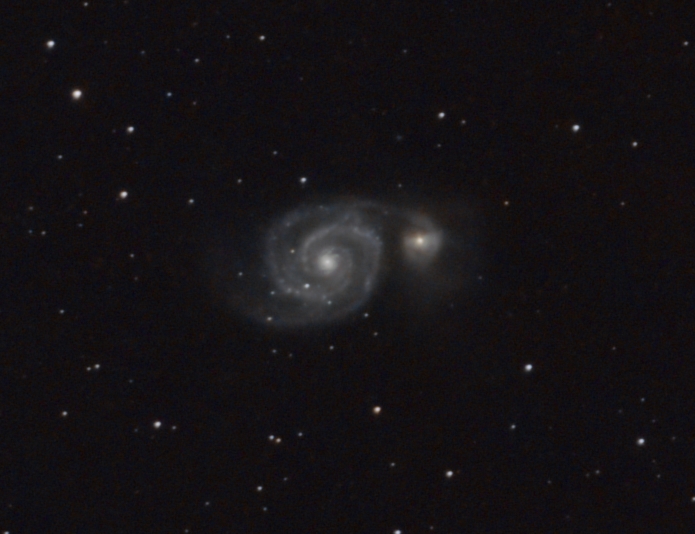
Messier 51 has a clearly defined spiral structure that is visible to the naked eye in larger telescopes. Its gravitational interaction with neighboring NGC 5195 has resulted in a lot of new star formation, giving it a bluish hue.
The clouds came back on the days that followed, but I got in another run on May 13th. The wind was blowing pretty hard from the south, though. So, I tried something that I knew wasn’t a good idea: I set the scope up on the deck. The deck is not a very stable platform for astroimaging. It picks up vibrations from the wind, anything moving across it, and potentially even the house. But that area offered protection from the worst of the wind, and I wanted to see what would happen.
This image of M106 is the result of 677 15-second exposures at a gain of 90, for a total of 2.8 hours of integration time.

Messier 106 is a difficult galaxy to image because of its bright center and dim outer portions. Galaxy NGC 4217, located in the lower right among the pretty stars, is seen nearly edge-on from our perspective, revealing a prominent dust lane along the plane of its disc.
There were more than 900 images from the M106 run. I went through each of them manually to discard those that had obvious vibration and tracking errors. Just under 75% were “keepers,” which I don’t think is all that bad except that these were relatively short exposures.
I was hoping that setting the gain to 90 would yield more detail, but I think it only produced more noise. Maybe I will try again when the sky has less moisture and smoke affecting the transparency.
While I may consider imaging from the deck in some special circumstances, it is really a better idea to set the rig up on the ground. I don’t anticipate doing much from the back yard, however. The deck and fence reduce the field of view which is already narrow between the house and the trees behind the yard.
Each of the above images was processed in Siril 1.4.0 Beta. It integrates with GraXpert for background extraction and noise reduction (although I don’t think it works with all of the features just yet), and they have introduced Python script support for image processing. I highly recommend the Statistical Stretch Python script, which is available from Get Scripts in the hamburger menu.
The weather is not looking good for the next several days, but there is a possibility that it will clear up enough for some imaging sessions toward the end of May.
Leave a Reply