Orion Nebula
I have been waiting to image the Orion Nebula since I received the Dwarf 3 nearly a year ago. The time finally came when the nebula was in the ideal position, but weather and other factors limited my ability to collect good image data.
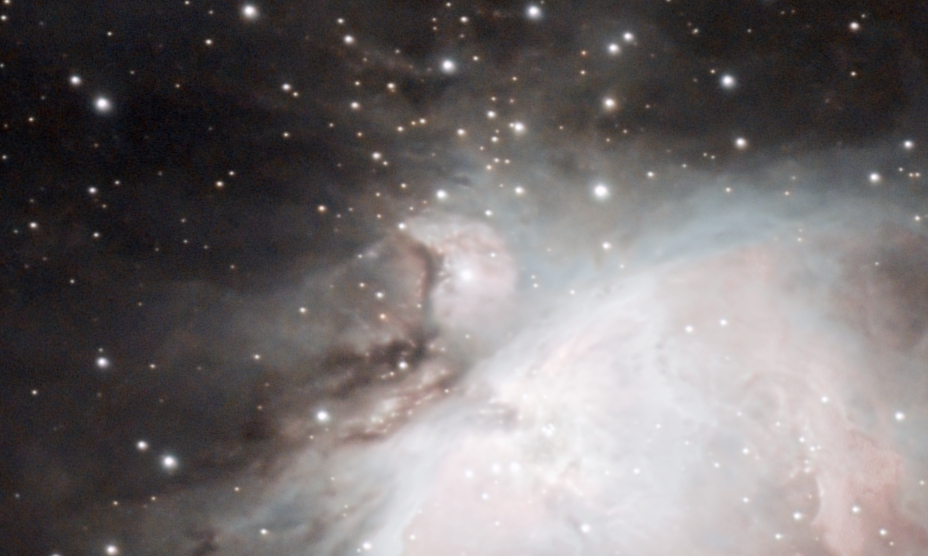
Messier 42, the Orion Nebula, and its neighbors Messier 43 (De Mairan’s Nebula) and NGC 1977 (the Running Man Nebula) are somewhat difficult to image due to their high dynamic range. Short exposures miss the faint parts of the nebula. Long exposures bring out the faint details but overexpose the bright parts.
In order to produce an image that shows the entire nebula complex, I have to take multiple sets of images at different exposure times and then combine them in image editing software.
I didn’t have any trouble taking the short exposures, but when it came time to do the long exposures the countryside went up in flames–literally. Several controlled burns, including a large one less than a mile away that lasted several days, were set in various parts of the county. In addition, some real wildfires broke out nearby. If we weren’t enveloped in ground-level smoke, then smoke filled the sky and obscured faint astronomical details. This has been going on for weeks.
I was able to get a few good shots during four separate imaging sessions but gave up trying to get more because the smoke shows no signs of clearing, real clouds and rain have started to set in, and Orion is getting lower on the horizon.
So, here is the result. I think I can do better, weather permitting. I’ll try again next winter.
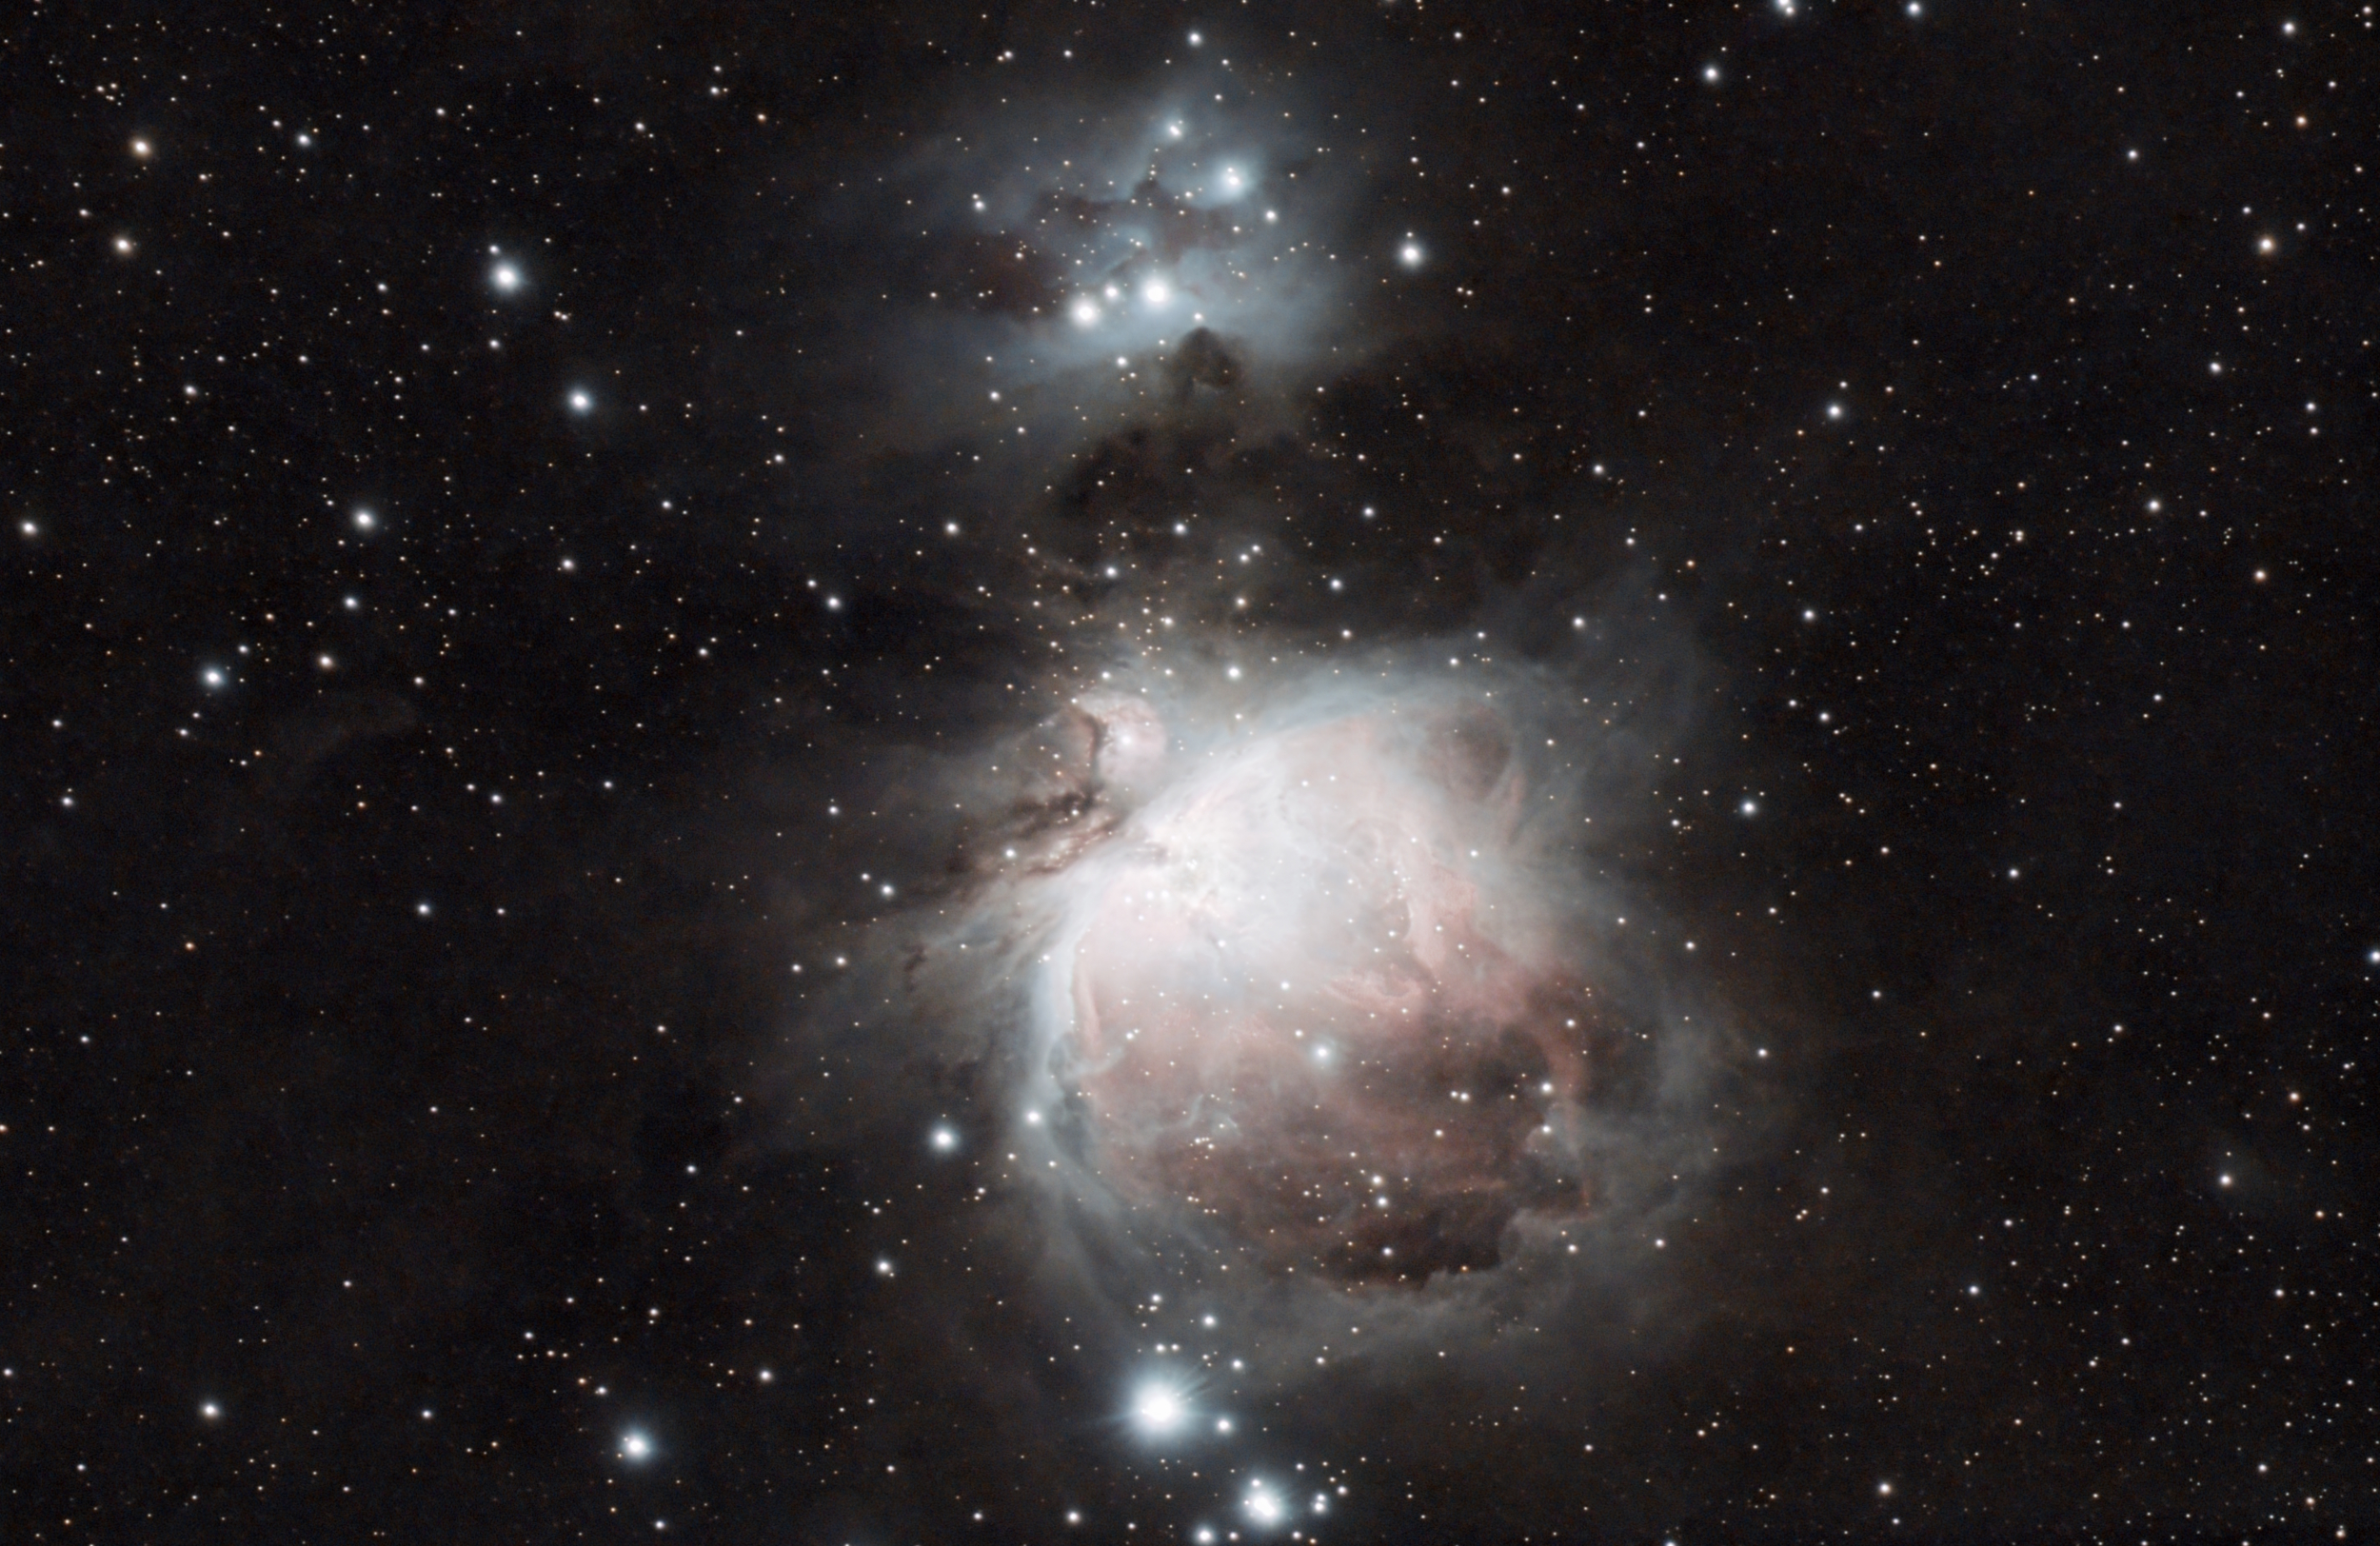
The above is a combination of sets of 0.1, 0.5, 1, 5, 15, 60, and 120-second exposures at 60 gain using the Astro Filter. The image sets were processed in Siril and then combined in Gimp.
I followed a consistent pattern for processing each set of exposures so that the colors and details would match when combined. The basic workflow for each set in Siril was:
- Stack
- Crop out all parts of the image that did not overlap during stacking
- GraXpert AI 1.0.1 background extraction (default settings)
- Plate solve
- Spectrophotometric color calibration with these parameters:
- White Point Reference: Average Spiral Galaxy
- OSC Sensor: Sony IMX678
- OSC Filter: SvBONY CLS
- Remove Green Noise (Average Neutral)
- Cosmic Clarity Denoise (default settings)
- Cosmic Clarity Sharpen (0.5 for non-stellar, 0.25 for stellar)
- VeraLux HyperMetric Stretch (default settings)
- Save the image to a file
After each exposure set was processed, I copied the final files to a separate folder and, in the Siril control panel:
- Conversion tab:
- Added all of the files to the Source list
- Entered a sequence name (OrionNebula)
- Clicked Convert
- Registration tab:
- Set the Registration Method to Global Star Alignment (deep-sky)
- Clicked “Go register”
In Gimp, I loaded each of the registered images (r_OrionNebula_00001.fit, r_OrionNebula_00002.fit, etc.) as a separate layer, going from the shortest exposure at the bottom layer to the longest at the top. The registration process in Siril aligned all of the images, so there was no need to move the layers around to match them up. I created layer masks for each layer, then starting at the top layer, used the Fuzzy Select Tool to select the overexposed sections of the image, feathered the selection, and then used the Bucket Fill Tool to fill in the selection with black in the layer mask to bring out the portion of the layer below. (I adjusted the amount of feathering of the selection area until it looked right.) I continued the select, feather, fill process through each layer until the brightest portion at the bottom layer showed through to the top.
I then exported the image into a FITS file and made some final cosmetic adjustments in Siril.
If none of the above made sense, but you’re interested in learning the process, leave me a comment and maybe I’ll make a video of it someday.
Leave a Reply